
So this one has been a long time coming. It was not so much a lack of blogging, but a lack of stuff to blog about. It has been a month of highs and lows as far as my production. Lots of news in different directions. I am going to try anf just get caught up and may end up leaving out details I was not a good at taking progress pictures this time as I have been in the past. If there is anything you have wuestions about, please let me know.
I feel like in order for me to keep track of what I have done, I need a table of contents, So Here you go:
New Anvil and 1st project
Halloween Surprise
Mastermyr Lock
Mastermyr Spoon Auger update
Mastermyr Hammer #2
Margaret & Cataldo’s Tripod
Draw Knife
Ogham Opener
Mastermyr Hammer #3
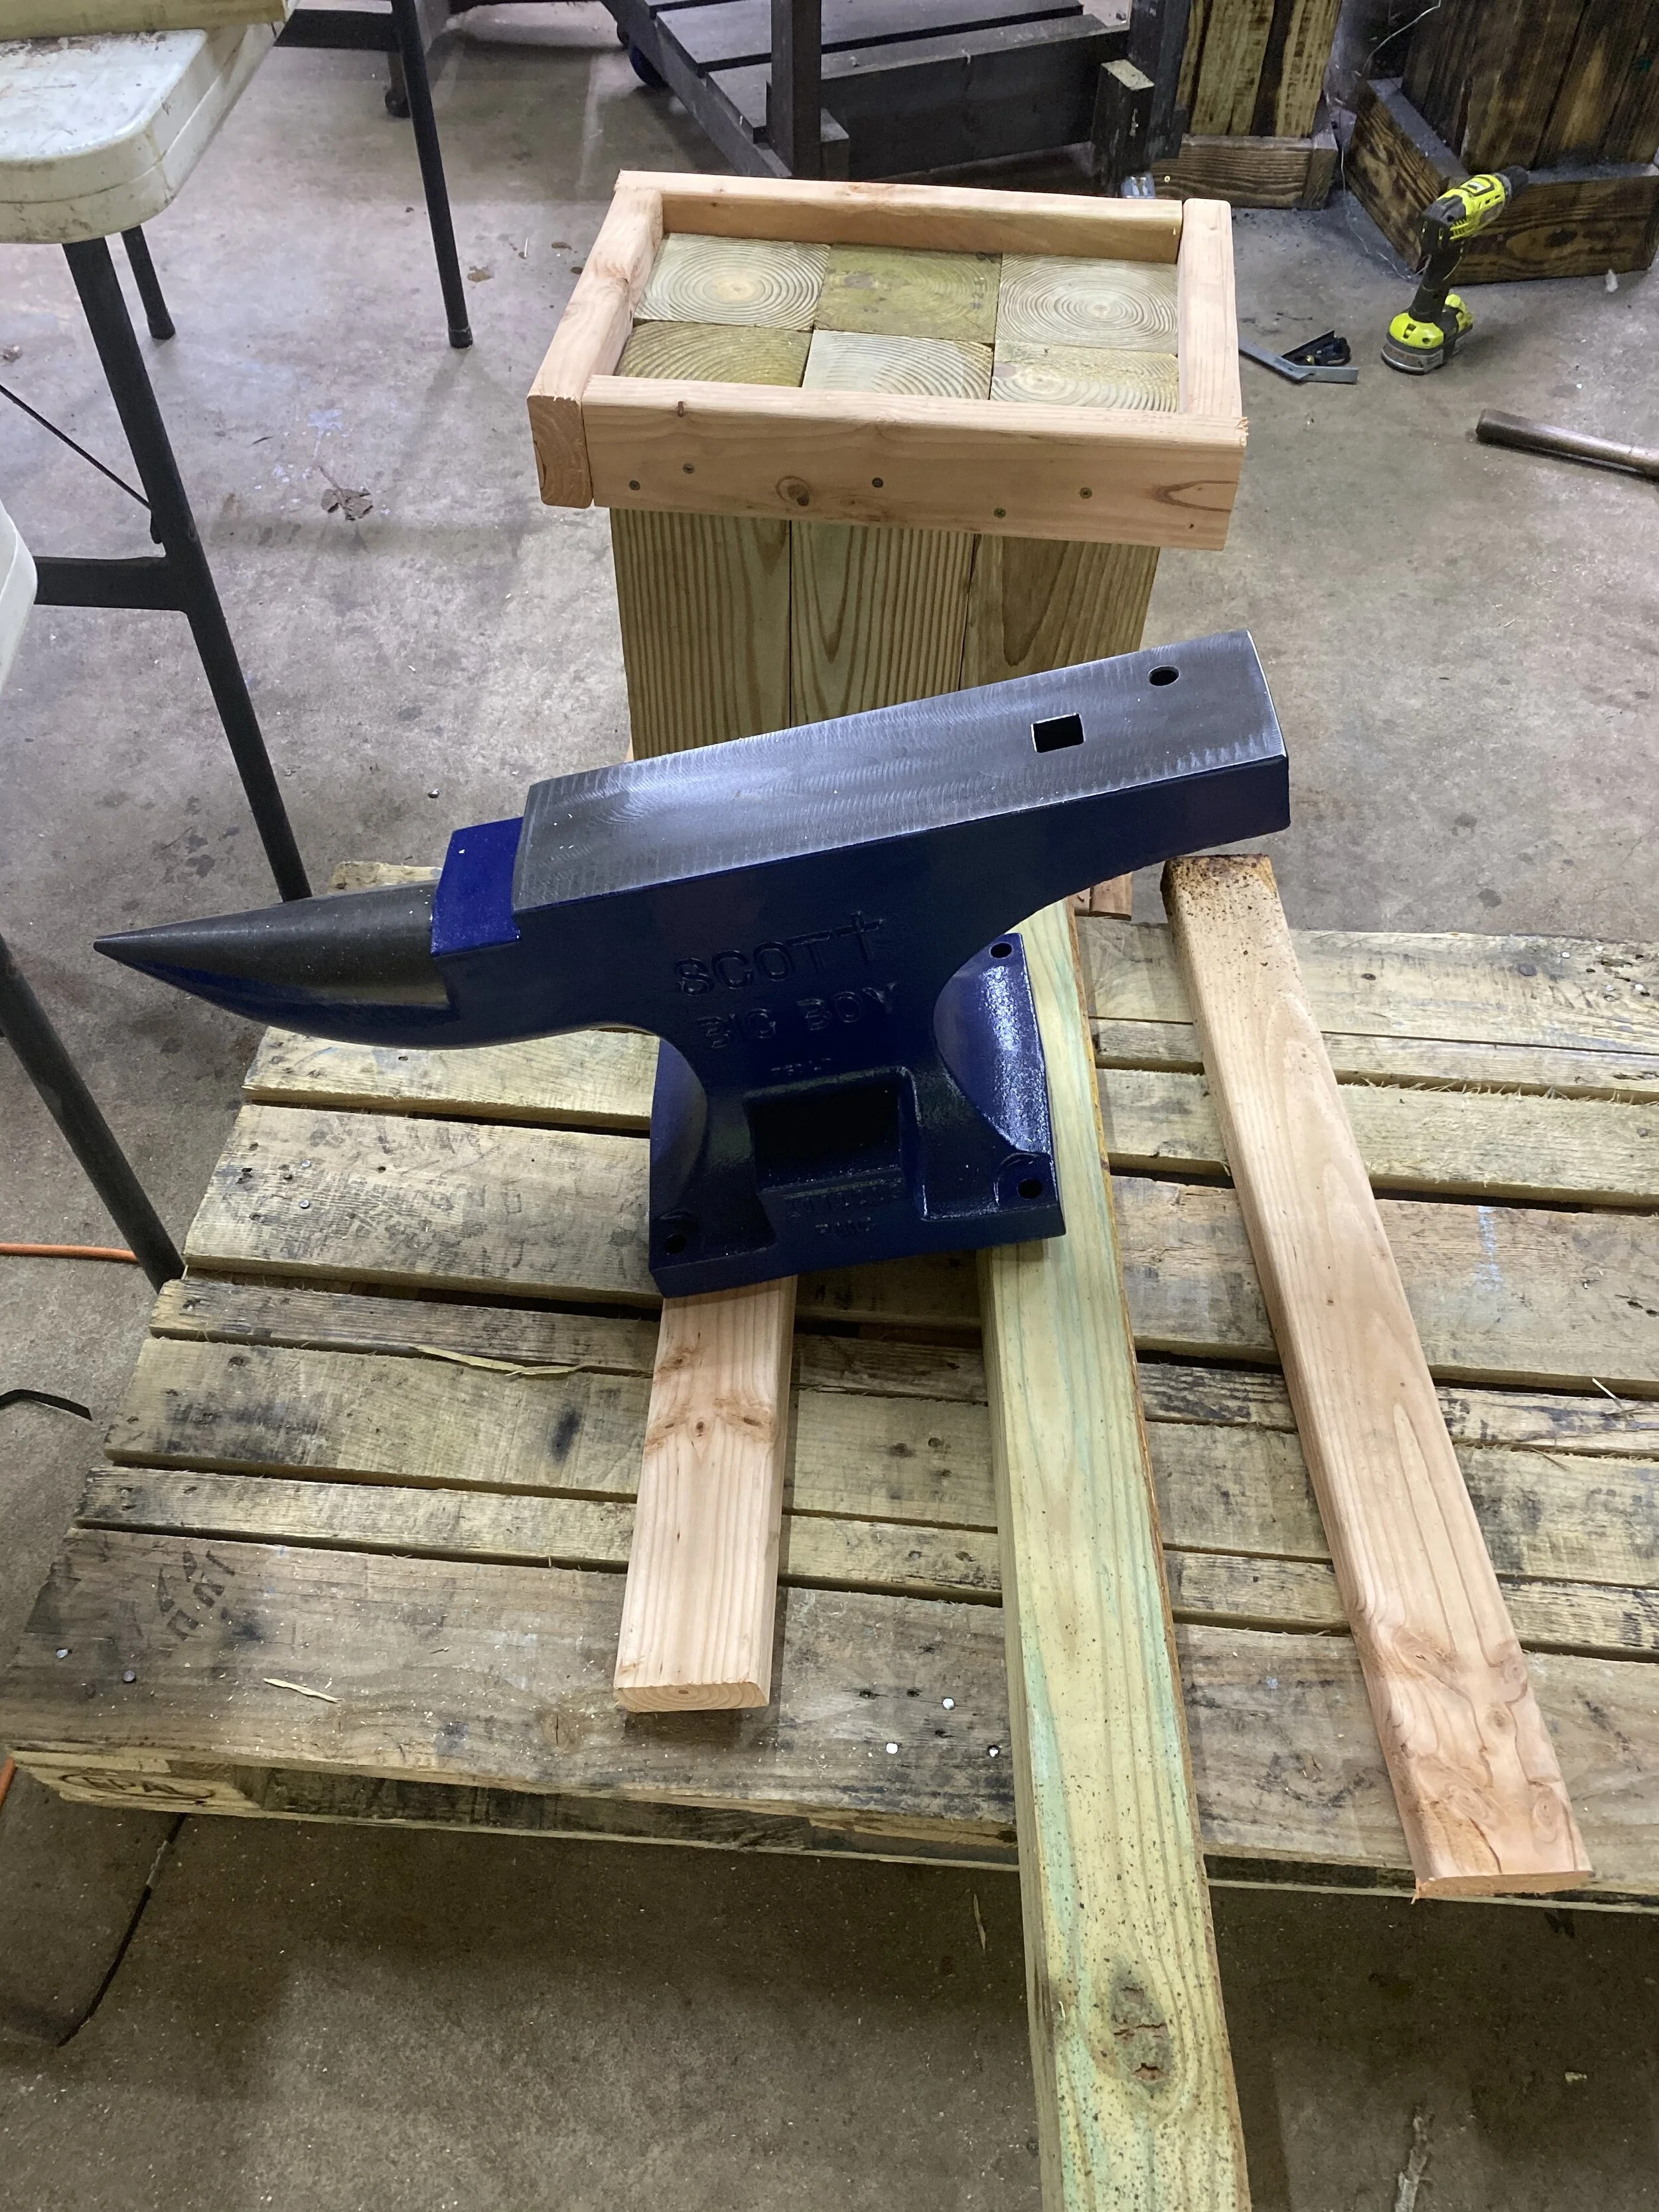
New anvil and first project(or why this blog took so long):
After almost a year of putting my pennies away, i was able to save enough to get the anvil of my dreams for the shop. (alright I bought it before I had all the money saved, but they were having a sale). This was a 250 lb. Scott’s Big Boy. It was delivered by freight to the entrance to the garage. It was quite a difference from my 70 lb. NC Tool anvil:
When you get a new anvil, you need to create a new anvil stand. Fortunately, I had Dapper to help with the construction:


Having finished the stand, how does an old, out of shape blacksmith get a 250 lb anvil onto a 2 foot stand. It is not something that I stood a prayer of being able to pick up, but I could rock it. So I would use the same techniques that we think were used to create Stonehenge and the pyramids. By rocking it to one sise, I could just get a board under that side. Then I could rock it the other way and get a board under that side. I started with 2x4, then 4x4s then and so on…..


So it’s out with the old and in with the new:


Having a new anvil, it was time to start a new project, Jenine requested an arbor for the herb garden, so I thought I would try my hand at Architectural blacksmithing. BAD IDEA! I did not come up with a good design and did not understand the properties of the materials I was working with and so spent 2 weeks frustrating myself until I just gave up in utter frustration. I still plan on making an arbor, but I will need to spend a lot more time in design and planning.
Halloween Surprise
After the Arbor disaster, I took a little break from forging and regathers my forces. Fortunately, my household came up with a Halloween gift exchange and this gave me something else to concentrate on. Instead of buying a gift, I decided to forge one. I will not be posting anything about that now, but will be making a quick post after the exchange. It is written and will post on the first.
Mastermyr Lock
So now that I was back in the saddle and forging again, I was time to revisit the Mastermyr find. Earlier, I had made a Viking style chest for Grimmsfield and based loosely on the Mastermyr chest. No it was time to look at the chest in a little more detail.


The hinges I created for the 1st chest were generic hinged based on this chest, but the clasp on the front had no lock at all but just a padlock clasp. At this point I decided to tray and make a better representation of the chest itself. The first step would be to see if I could build a lock for the chest. Locks and their keys were a very important part of Scandinavian life in the dark and middle ages. Keys were used as a sign of status within a household and complicated locks were found on several chests from the time. The Mastermyr chest had several keys and padlocks in it as well that I hope to visit later.


Once the design and plans were laid out, it was time to stare work on the lock. The first step was laying out the plate that the lock would be built on. This was then cut for the key and clasps. Once the plate was drilled, work on the sliding lock and spring began. The sliding bar was quite a complex shape and worked out fairly well. A problem occurred when the 2 were matched up. The plate and slide would not work together. Rather then remake the slide, i decided to remake the plate. That is why the number of holes changes in the picture. I also came to the decision that I was not going to make an exact copy of this lock to the measurements of the original, rather I was going to make the lock as it would have been made. Judging by the finds of chest locks as well as looking at the locks found within the chest, each lock was made on an individual basis and no two locks ever came out the same. Going on this assumption, I was just going to build a lock in the spirit of the Mastermyr chest and not build it to the exact specifications. The spring for this lock was made from a piece of spring steel, but the temper that I put on it did not quite take as well as I hoped for so the lock ended up a little wonky.


The key design was based on other finds from the same area and time period. The key that fits this lock was never found. This is one of 2 types of keys that could have worked this style of lock. The other is designed to turn and fit into the holes on the bar. The lock can be seen operating in the videos found below. Sorry for the poor quality.
There is so much more that I have to say on this lock, but this will have to do for now. More to come in either the documentation or in the next steps on making the chest.
Mastermyr Spoon Auger update
While gathering firewood, I came across a nice piece of hickory and decided to do some woodworking with it. There was no sign that the spoon augers found in the chest had the wooden bodies attached, but I decided to bake them functional and add the rest to them. The shape and design were based on similar augers found both in period and later.


There is more to be said on this as well that will be covered in the documentation.
Mastermyr Hammer #2
This was only partially successful forging. There was a hammer head found in the chest that we now call a dogs head hammer. I decided that this would be the next object made from the chest. I was able to make a hammer that will do what the hammer found in the chest would do, but I was not able to form it the way I was planning on nor was it in proportion to the one found in the chest. The piece of hickory mentioned above also supplied the wood for this handle.


Margaret & Cataldo’s Tripod
This cooking tripod is to be a housewarming gift for Margaret and Cataldo. It is to help them live the SCA life as best they can. It is based in the first tripod I made last month, but much longer and out of thicker bars. Working this long of a piece of iron that is this heavy pushed me to my limits. Steel this thick moves very slowly, and I had trouble holding it aloft long enough to work it well. It was worked on in several stages to keep my arms from becoming to fatigued.


Draw Knife
Having started on making tools needing wooden handles or parts, I decided that the next steps were to start making some woodworking tools. Hopefully to get away from using the lathe. The first one I decided that I needed was a draw knife. This will be used for making the handles for other tools. I am using 4140 steel for better edge holding abilities. This steel is a lot harder to work then the mild steel that I am used to. I was able to rough out the shape and then needed to take a break. I will get back to working on this the next time I fire up the forge.


Ogham Opener
This was actually the last project I worked on before writing this blog, but I wanted it embedded within the content for reasons that will become apparent. So after tearing myself up doint the forging on the hammer and draw knife, I wanted to end on something fun. Sitting in front of me as I was thinking of what to make was my “Ale Killed Us” mug from Dancing Pig Pottery (https://www.etsy.com/shop/dancingpigpots) This mug is inscribed with the Ogham script for ale killed us (we are hungover) that was found in the margins of a manuscript. (for details, google it). “That would make a great bottle opener!” I exclaimed, quite starting the dog, who was sleeping in the forge. Ans so I set to work:


So, in making this I screwed up. I decided that 4 inches was the right amount of steel to use for this project, and I marked the bar for cutting when I was done working on it. I failed to leave enough room for the script. The script ended up running over an extra inch. This left a cutting line in the middle of the script. I feel that a stronger taper on the handle would improve its looks as well. So this is now a prototype and a sampler to work from. Now for the reason that I snuck this into the middle of this entry. For the next 10 people who comment on this post, Either here or by sending me a note at grimm@grimmsfield.com, I will be glad to make them one of these openers for your personal use. Yours will not have the cut line and will probable look at least a little better. This will be true till I have given out all 10 or I stop forging. I will probably go ahead and make a few in advance.
Mastermyr Hammer #3
Good lord but this is getting long. So, before the opener but after the draw knife start, I came across a 1 in. square bar that i purchased to make another Mastermyr hammer. As I am a glutton for punishment, I decided to start drifting the eye and forming another hammer based on the chest. I spent almost 2 hours heating and drifting the hole on this block before I ran out of stem. I will finish this up the next time I get to the forge.


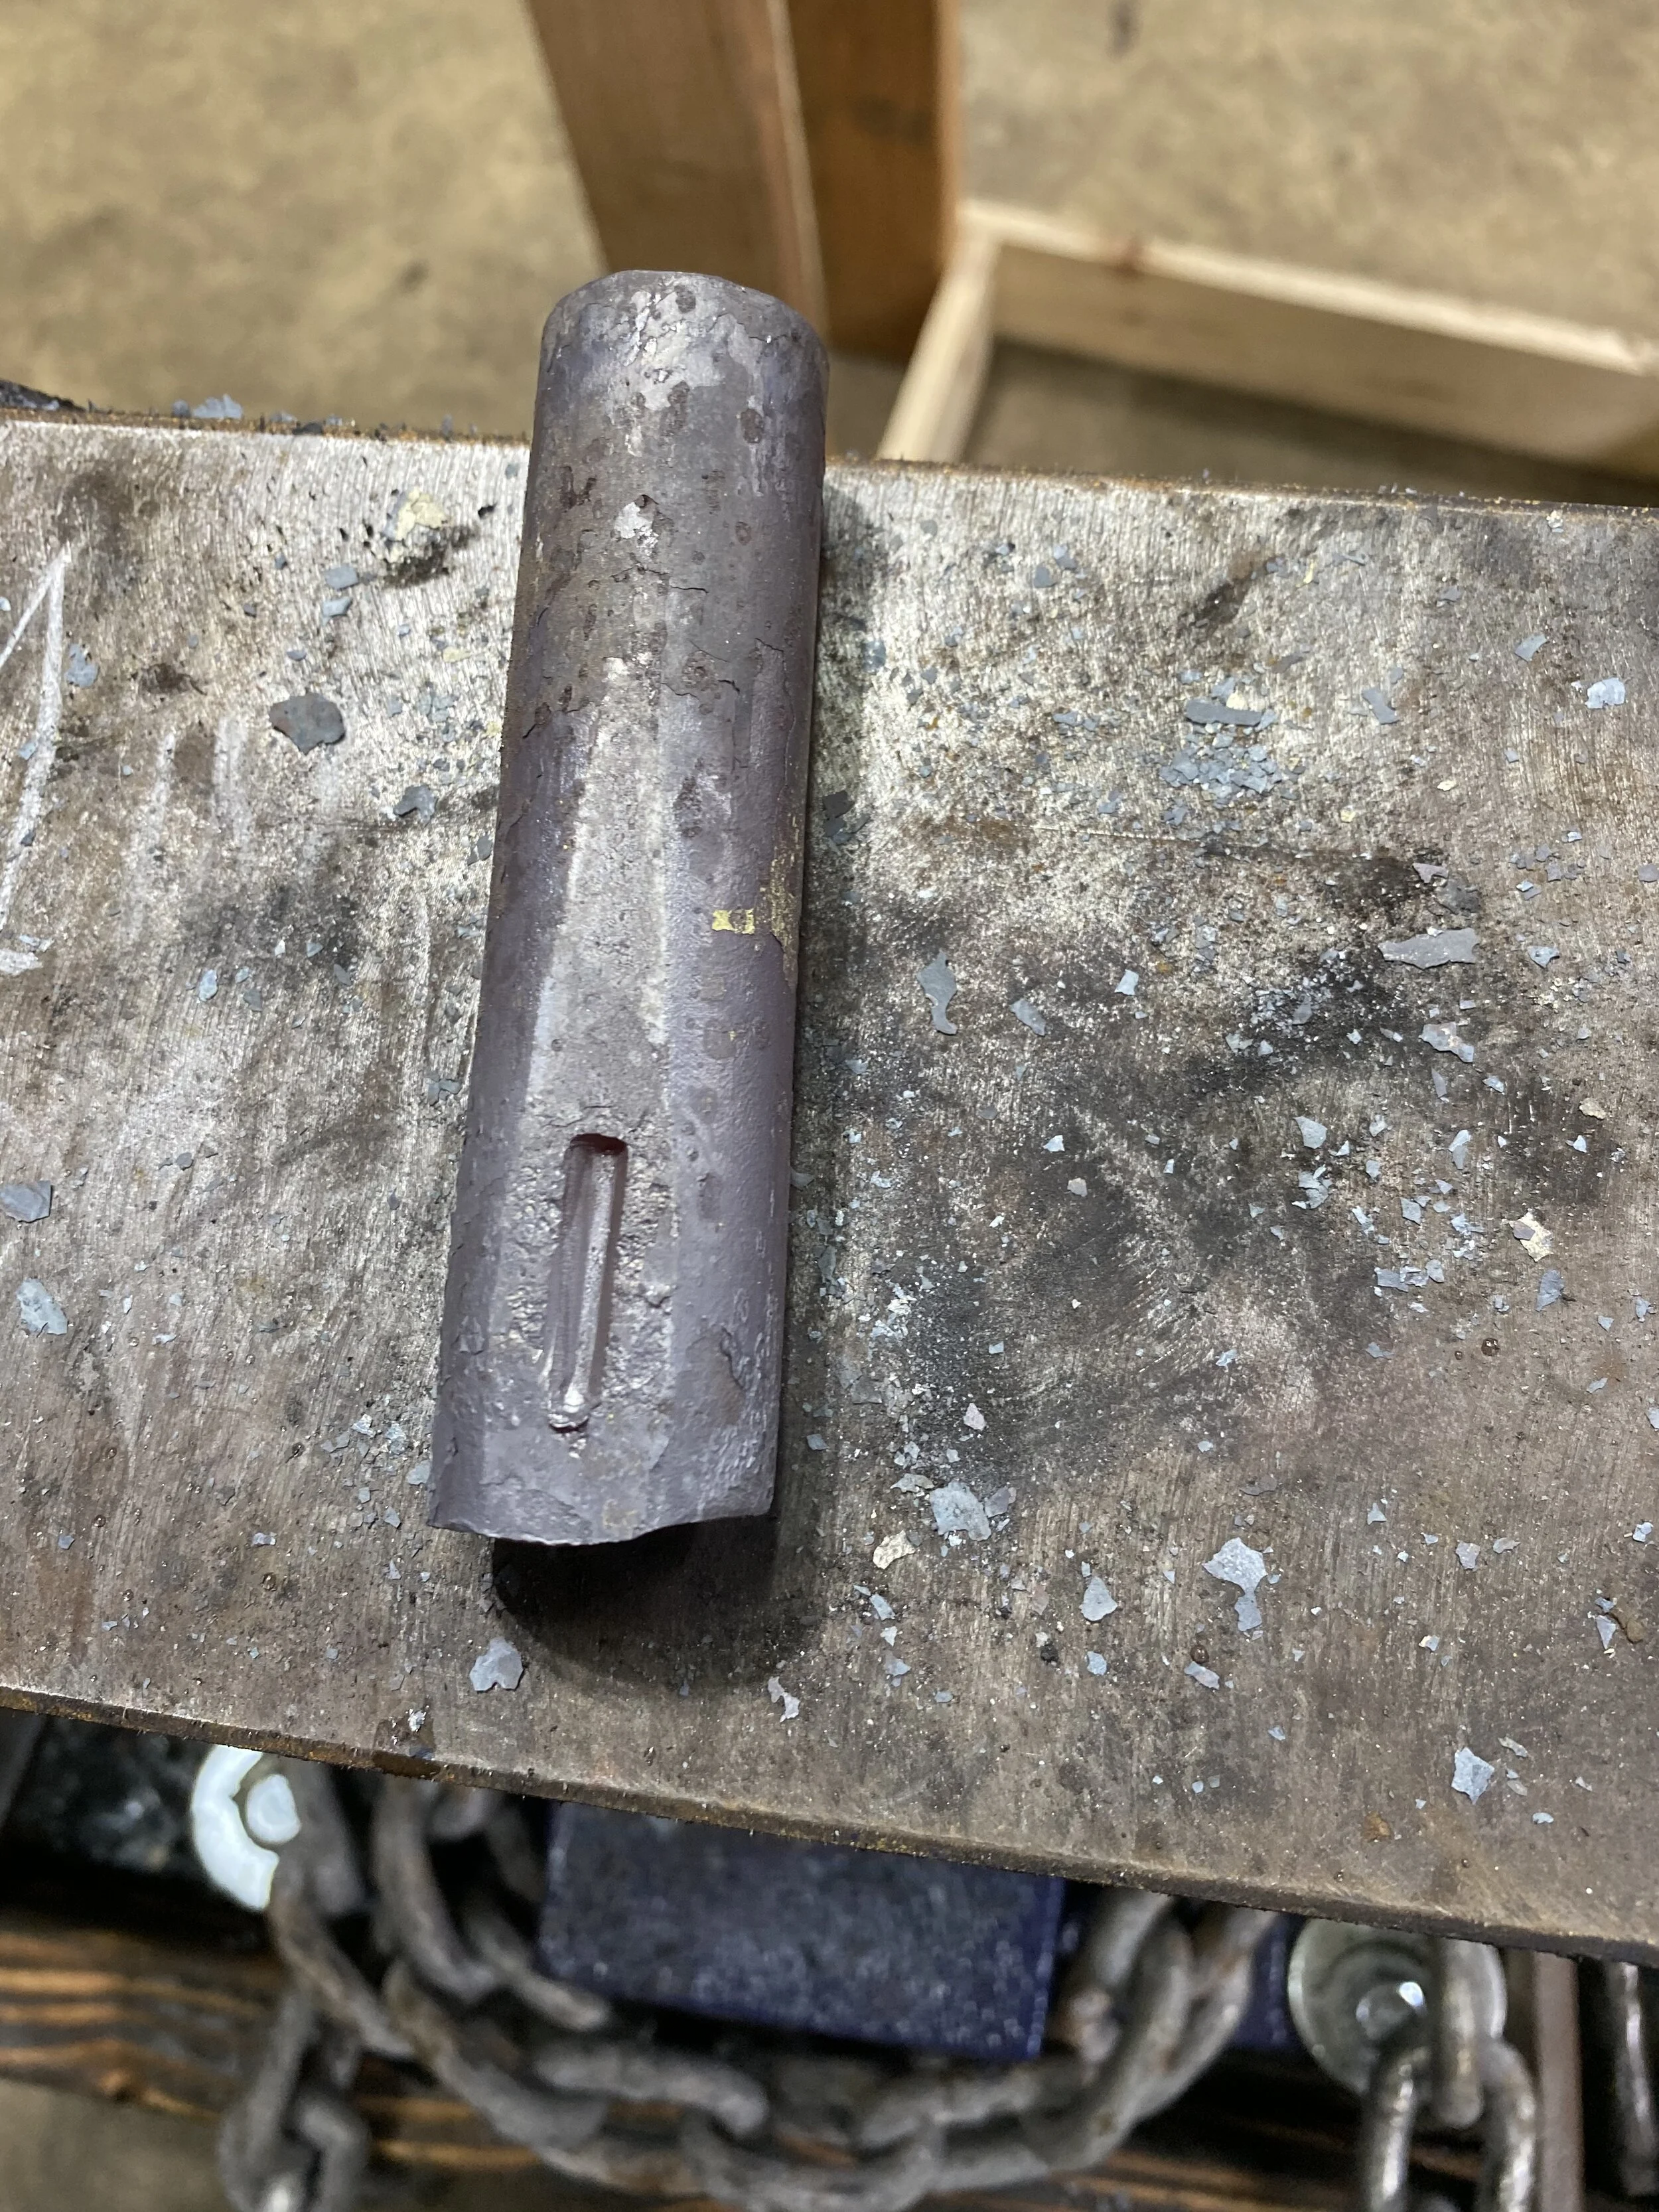
Well, that’s about it from the forge. The Mastermyr chest has really caught my attention at the moment, so expect to see more coming from that find. Here is an image of all that I have done from it so far. Thanks for reading.